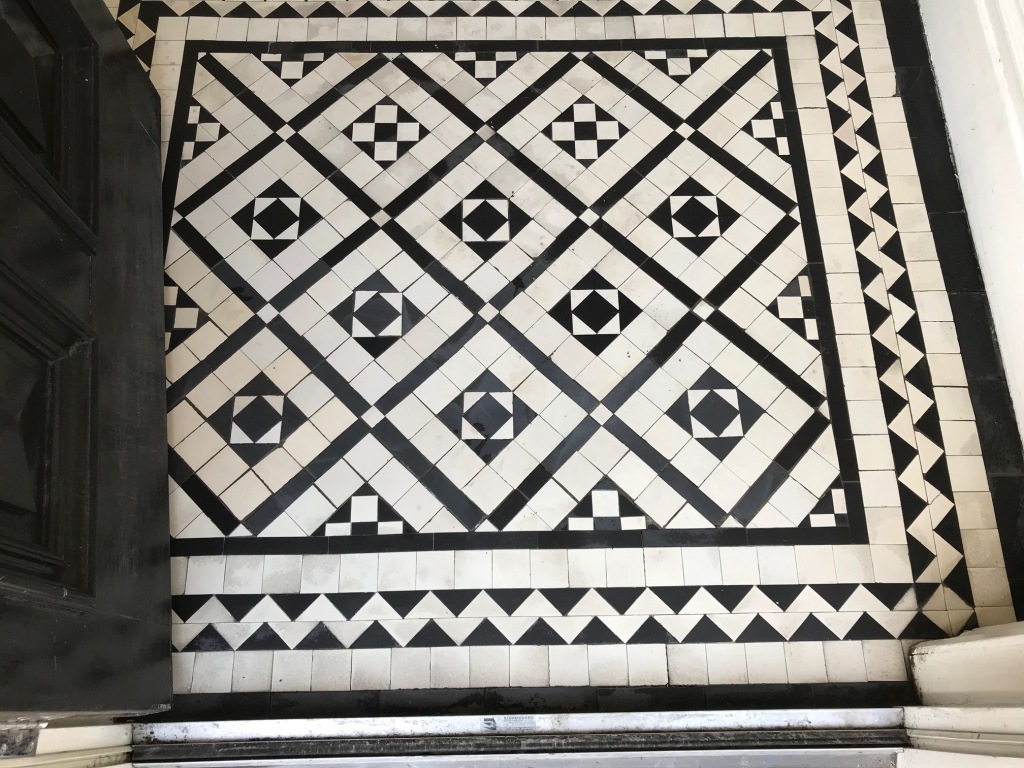
I visited this property in Lytham St Annes to survey a small Victorian tiled lobby which was in a sorry state. The client was keen to have it restored and wanted to know if it was possible. I discussed with them what we could do, and I gave them a quote for the work. Although it was only a small lobby, I could see the job could be quite involved and would be subject to the replacement tiles which I was confident we could source.

Repairing a Victorian Tiled Lobby Floor
This is one of those jobs you wish you hadn’t started as there were a lot more tiles to remove than anticipated and it mushroomed into replacing half the floor. Once the area was cleaned up, I applied a self-levelling compound to bring up the height of the base.

Once the levelling compound had set, I was able relay the Victorian tiles using a combination of original tiles and replacements which had to be cut to shape. Cutting tiles to fit is quite intricate and time-consuming work especially when you consider new tiles are all metric in size and a 2mm difference becomes very telling after a foot or so! My solution was to use 150 mm tiles which are the biggest the stockist offers and then cut them down on my Rubi cutter using a template made from the original tiles. This the only way I could get it to look tight, it takes longer but it makes for a thorough job and a better finish.

I always use flexible floor adhesive when laying tiles, my preference is Keraquick Grey from Mapei. There are other brands off course but this one is quite easy to get hold of and as the term grouting is a relatively modern invention (in the past it was called pointing ) I find it looks right with this type of tile and similar to the screed cement the Victorians used in the past.
Deep Cleaning a Victorian Tiled Lobby Floor
After the tiling had been completed, I left the floor to cure and fully dry and returned at a later date to give the floor an overall clean. For this I ran a coarse 200-grit diamond floor pad across the floor lubricated with water and used handheld diamond blocks for the edges where the pad can’t reach. The slurry was rinsed off with water and extracted with a wet vacuum.
With old floors like this, which don’t have a damp-proof membrane installed under the floor, efflorescence is always a concern and can lead to white salts appearing on the surface of the tile as moisture rises through the floor. To counter this, I finished cleaning the floor by scrubbing it with Tile Doctor Acid Gel. This was then rinsed off with water and the soil extracted using a wet vacuum.
Sealing a Victorian Tiled Lobby Floor
The client was happy to seal the floor themselves (they wanted to save some money and it wasn’t a big area) so I supplied them with a bottle of Tile Doctor Colour Grow. I recommended this sealer as it will enhance the dark colours and being fully breathable it will cope with any moisture rising through the base. I recommended they apply two coats to start leaving time to allow the first coast to dry they could also then decide to leave it at that if they were happy with the finish.

Source: Victorian Tile Repair and Restoration Service in Lancashire
Covering the County of Lancashire, Russell Taylor is your local Stone, Grout and Tile renovation expert and an agent of Tile Doctor, the largest Tile, Stone and Grout restorative cleaning network in the UK who have developed the products and techniques to handle a multitude of issues surrounding tile, stone and grout, internal and external, domestic or commercial.